Latest Posts

a new sweater, ready to wear

I believe there are two types of knitters, the ultra-careful ones that faithfully follow a pattern and will not give up until they “get it right,” and those that cannot help adding their own “touch” to every piece. These are the knitters that no matter how hard they try to follow a pattern, end up skipping steps, adding and removing stitches at random when they notice they’re off track, and see any mistake as a decorative element. They’ll also do anything to avoid ripping back!

I identify mostly with the first group. Typically, I choose a pattern because I love what it looks like in the photo of the magazine, website, or book it is in, and I’ll often go to great lengths to get the exact yarn that is recommended. A good example is the April Blouse I’ve been working on, where I scoured the Internet to find the same yarn and color I had seen on the @sandnesgarn brochure.

I’m also the type of knitter that needs to fix their mistakes. I would rather start over than have a mistake bug me forever. I blame my grandmother for this mindset. She would always say, “If you’re going to do something, you should do it right.” 

So, I tend to take each project as a small challenge, like a class I need to pass to achieve a higher skill level. 

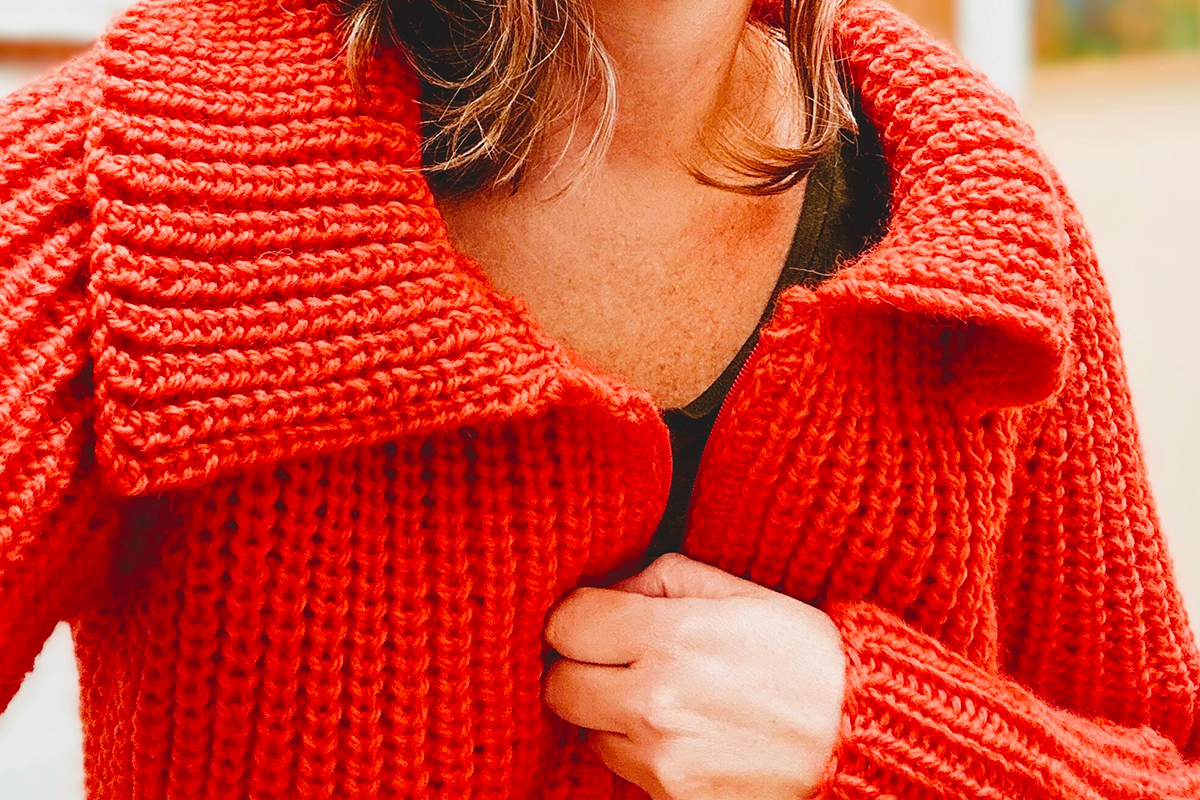
Last Friday, I finished knitting this red jacket, which was an experiment to see if I could adapt a pattern using a different yarn and a slightly different gauge. 

Adapting a pattern was something I had read about, but never had to do. I was a bit nervous that my calculations wouldn’t work but decided to go for it anyway.

I must admit, this was a super low-risk experiment: The yarn I was using wasn’t too expensive and the pattern was pretty basic – a raglan construction knit in pieces that you then sewed up together– something I am quite familiar with.

The typical setbacks

I don’t think I’ve ever knit anything where I didn’t (at least momentarily) wonder if I was interpreting the instructions correctly. While working on this sweater, the instructions for making the sleeves slowed me down quite a bit.

First, I was trying to figure out if there was a special way in which to increase when knitting the half fisherman’s rib stitch, a stitch I had only used to make scarves.

Could you really increase only one stitch at each end and stay “in-pattern”? What type of increase should I use? Left-leaning, right-leaning, lifted increases? There are so many ways to do this. This led me down a rabbit hole of videos on Youtube.

Then, I had to decipher another part of the pattern. It said to increase every 8th and 10th row. Really? Hmm, that didn’t look right. I wish I had taken photos of the results. I ended up with pretty funny-looking sleeves! 😂

Thankfully, most patterns include schematics which helped me realize something wasn’t right. 

This is the instruction that confused me the most:

“After first inc. cont. in half fisherman’s rib. At the same time inc for sleeve shaping at each end 1 st. on every 10th row 8(4) times and 1 st. on every 8th row 0(5) times.”

What I did: I increased on every 8th and 10th row “at the same time,” making the increases super close to each other.

What I was supposed to do: Work the first 8(4) increases every 10th row and [THEN] work 0(5) increases every 8th row. 

After knitting and unraveling the left sleeve twice, I finally got it right on the third try.

Other minor setbacks during this project:
1- picking up stitches for the collar: I did this four times before I was happy with the result.

2- making the zipper band: For this, you had to turn your yarn into thinner yarn by removing some of the threads that made it up. This took a while but was totally worth it. It’s a cool new technique to add to my toolkit. 

3- installing the zipper: This step has the potential to ruin your whole project, so I took my time to pin the zipper in place and carefully trim the excess.

The sweater took a bit longer to complete than I imagined, but it fits and I think it looks pretty good (although I’m not so sure I like it with this white shirt).

I can see this becoming my cozy “walk the dog in the mornings or evenings” sweater. It’s quite warm and super squishy. It would be great for sitting around a firepit if we ever go camping again.

I still really love the look of the cotton version of the sweater, so I might knit it again in cotton to wear next summer. 

And now that I’ve dipped my toes in the world of pattern modifications, I think I would love to see if I can figure out how to add some pockets to this design.

Well, this feels like another completed class. And now it’s time to get back to work on the April Blouse! I have about six weeks left before summer ends.

These are two links I found useful while making this sweater:

  1. Installing a Zipper
  2. How to increase English Rib (Brioche)

Project Details
Pattern: Rebecca Knitting magazine #23. Pattern #3, Fisherman’s Rib Jacket
Yarn used for this sweater: Universal yarn Deluxe Chunky (bulky 7 wpi), 100% wool. Color: Autumn orange (23001, lot 10043), 100 g. and 120 yards/skein. Used approx. 900 g.
week 28: new f.o. and a delicious corn salad

finished! ribbon-tied wool vest

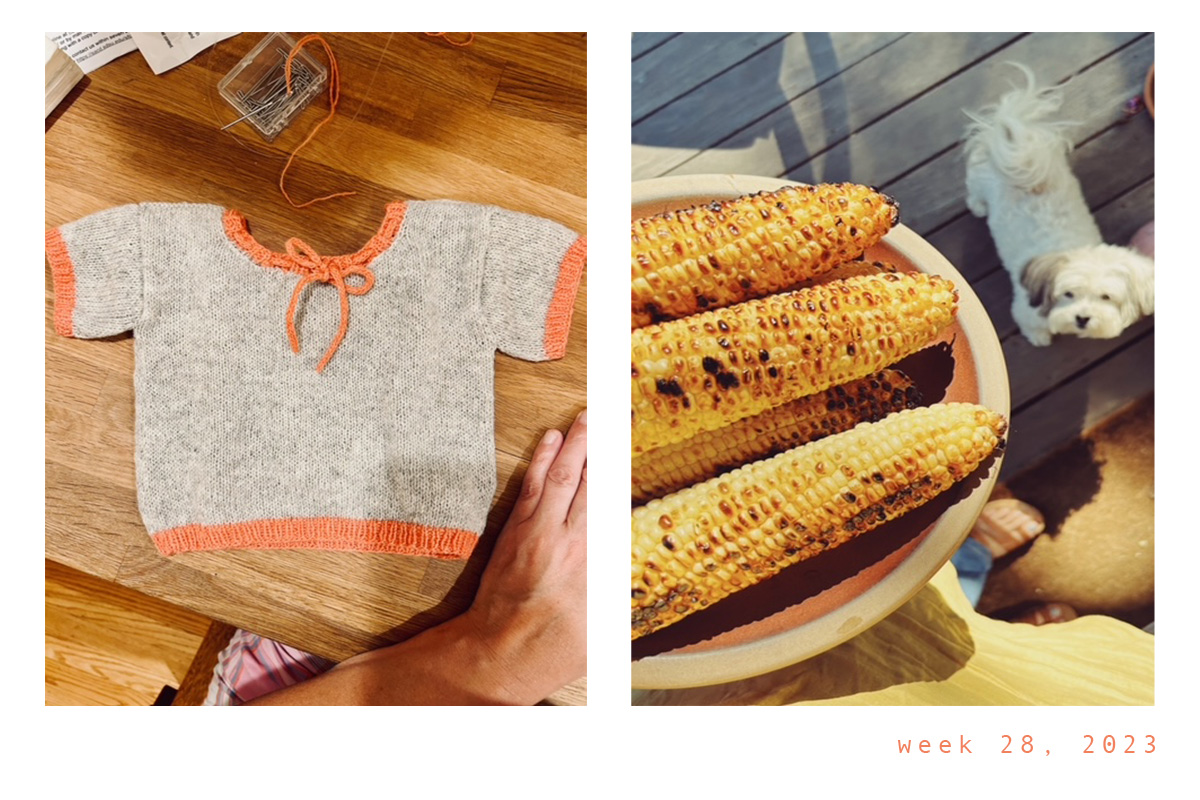
I finished knitting the baby top I started a few weeks ago and finally got it in the mail. Well, with a few hiccups.

I’d been worried that I’d taken so long to knit it, that by now it wouldn’t fit. Babies grow so fast! 

So, as soon as I finished it I ran out to buy a small envelope at the local pharmacy, looked up my niece’s mailing address as soon as I got back, and stuck one of my Elvis forever stamps on the front of the package. There. Ready to ship! Or, so I thought.

I put the package outside on top of our mailbox to make sure the mail carrier would see it, but when I went out to check later, the package was still there.

Oh, that’s right, it was Wednesday, we rarely get mail on this day, so the mailman probably drove past our house.

The next day, the same thing happened, which annoyed me a bit. So right before five, I drove down to the corner of our street where there is a blue collection box to make sure it went out that day.

Unfortunately, that box’s pickup time was 3 p.m., so I decided to drive to the main post office downtown. I was sure their last pickup was right at five.

I was right! I made it by a few seconds. I placed the package in the collection box and started to drive away, when I saw the mail worker in my rearview mirror, walking out to retrieve the packages. I suddenly wondered if I had put enough stamps on the envelope. So, I drove back to ask her.

The lady told me I couldn’t put this type of envelope directly in this box and that I did not have enough stamps to cover shipping – I am so glad I drove back! 

So, the next day I drove to the post office once again and was finally able to ship the vest. 

How did I not know I couldn’t just put this in the mail after all these years? 🫢🙄

The pattern is by Erika Knight from her book, “Simple Knits for Cherished Babies”. It was easy to follow, but I did have a little trouble with the sleeves.

Here’s what happened: the body of the sweater has straight edges. It’s knit like two big squares front and back, but the sleeves are curved. I wasn’t sure whether I should sew the curved part of the sleeve to the edge. (Now that I’ve read the instructions a few times, it does say to sew the sleeve head to the edge, meaning to include the curved part of the sleeve.)

After I sewed on the first one the wrong way, I immediately knew that didn’t look good and redid it.

In my defense, whenever you have a capped sleeve, the back and the fronts of the sweater also have curved edges. This was the first time I’d seen this construction. But, now I know better!

I made one modification to this vest. Instead of using ribbon on the collar as the pattern instructed, I decided to knit an i-cord instead.

It wasn’t that I had trouble finding the ribbon. I was able to get an exact match, which I thought was pretty amazing, but I didn’t like that it was shiny. That didn’t match the yarn I was using, which had a slightly rustic feel and I really like i-cords.

I would love to make another one of these little vests, but I might change the construction a bit. I don’t see a reason not to knit this in the round until you get to the sleeves, actually, the neck.

I’ll keep the grafted shoulder detail, I really loved that, but since this was the largest size that comes in the book, I’ll probably have to do some math in order to make a larger one. We’ll see…

Update: the package was delivered to my niece yesterday, and it fits!

the corn salad recipe you need to make this summer

We celebrated early July birthdays this week with a potluck dinner and I was asked to bring a salad. Immediately, a few salads I’d seen online came to mind, all made with corn. I LOVE corn.

At first, I worried that my choice of salad would not go well with the dishes others were bringing (I didn’t know what anyone else was bringing), but then I figured, it probably didn’t matter. People would choose what they wanted to eat, and I should make something I wanted to make because I’m convinced that when you do, everything tastes better! 

Well, honestly, I secretly hoped they would grill some meat because that would go great with this salad.

You should make it. It’s so good! It’s also a little different which makes it feel special and better yet, it’s pretty easy to put together.

Notes: 

Be sure to cook the corn on the grill! This adds tons of flavor.

I used the immersion blender to combine the cheeses to make a smooth dressing. I thought my family would prefer it this way. You may like the chunkier consistency of the original recipe.

I’m saving the recipe here the way I made it, but here’s the link to the original by @ Smitten Kitchen.

Ingredients

6 ears of corn, shucked

½ small red onion sliced thinly

2 tablespoons red wine vinegar

½ teaspoon sugar

¼ teaspoon kosher salt

1 lime, halved 

⅓ cup of sour cream

⅓ cup mayonnaise

1/2 cup crumbled feta cheese

½ teaspoon combination of guajillo chile powder and cayenne pepper

chopped cilantro leaves

Method

Heat your grill. 

While the grill gets hot, slice the onion into fine rings about ⅛ inch thick. Place the onion slices in a bowl with the vinegar, sugar, and salt. Put this in the fridge until you are ready to serve the salad.

Chuck the corn and grill it turning a few times until the kernels look nice and golden. It’s okay if they get a bit charred, it will add to the flavor. 

When the corn is ready, set it aside to cool while you prepare the other ingredients.

Using a food processor – or immersion blender (I used this) process the feta cheese with the sour cream until it has a smooth texture. You can skip this and just mix the ingredients by hand, but I like the smoother texture.

When the corn is cool enough to handle, remove the kernels from the husk using a sharp knife. 

On a large platter spread the cheese mixture evenly. Place the corn kernels on top and sprinkle with chile powder and cayenne pepper. Remove the onions from the vinegar mixture and spread them on top of the corn. Squeeze some lime on top and finish with some cilantro leaves. Serve right away, preferably while the corn is still warm.

Enjoy!

a new project and summer hiking

I can’t help it. I start new projects all the time. Just when you’d think I’ve got enough going on, something new pops into my head and I need to try it.

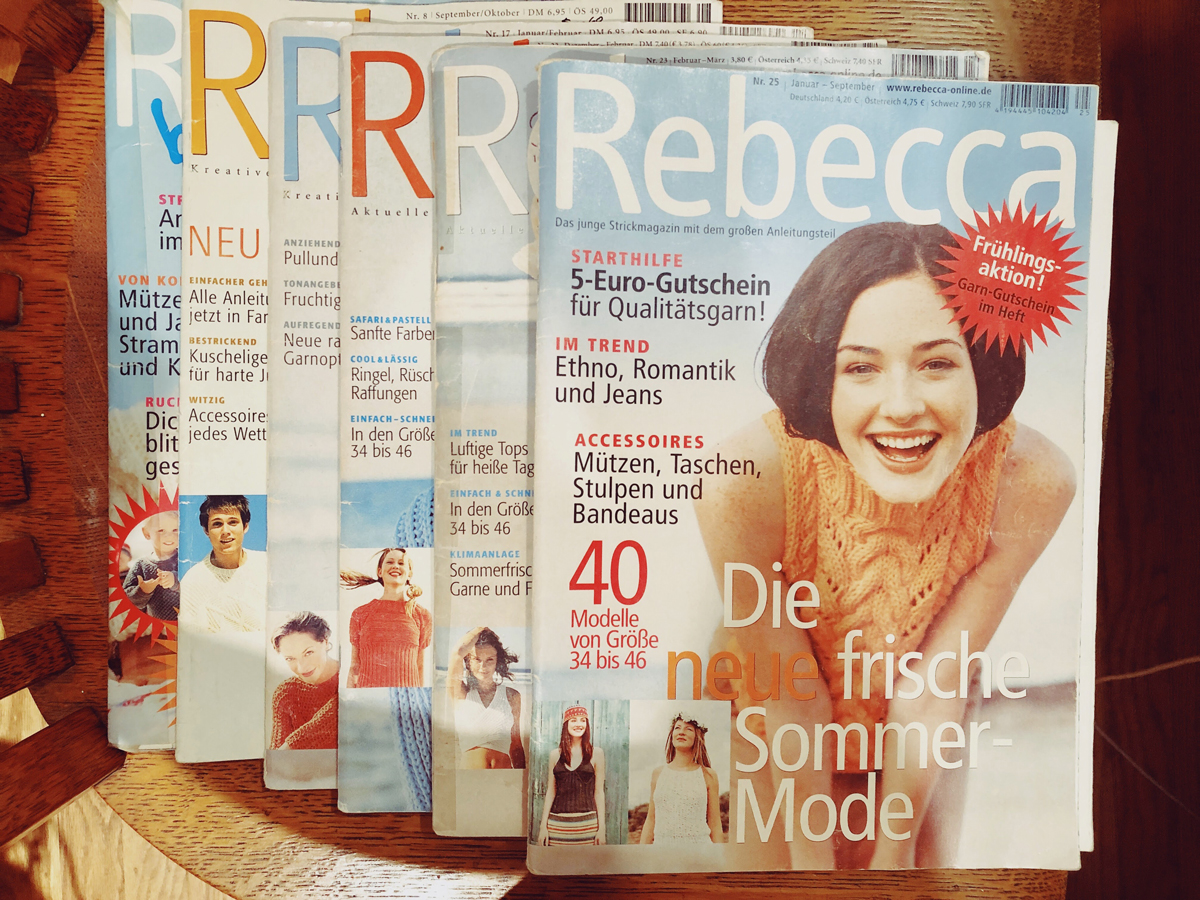
That happened this weekend when I was browsing through some of my old Rebecca magazines. These are German knitting magazines I’ve had since I started knitting (about 20 years ago.) Yes, I still have them! Do you save your magazines?

Well, I’ve found out most of my magazines are now considered vintage and you can only find them at places like eBay or Etsy.

Rebecca magazine is still published today, so you can easily get newer issues starting with #34 on their website, but earlier issues like the ones I have, #21, #23, and #8! Those are hard to come by.

So, I feel lucky to still have them.

Some people may ask, why bother keeping them if all the yarns are now discontinued? That’s right! But, if you can find a similar yarn, you can use them forever.

And that’s where my new project idea came from. Ever since I bought magazine #23, I dreamed of making this zipped-up jacket which is knit in half fisherman’s rib.

I loved the color, the chunky fabric, and the fact that it was cotton. But, like so many things I often want to make, I never got around to it. And now 20+ years have passed and this beautiful yarn is discontinued.

Since I’ve been knitting lace for the past few weeks using #3 needles to make the April Blouse, the thought of knitting something chunky in a super easy stitch pattern using large needles sounded like a dream. So, I had to cast on this sweater.

I remembered I had some chunky wool in orange-red somewhere in the house. Could that yarn work with this pattern? It would be such a good way to use up the wool, and if I liked the design, I could try it in cotton next time — if I could find something similar.

I found the wool and made a large swatch following the instructions for the sleeve. My gauge was slightly off, so I was going to have to make a few adjustments.

How did you do that again? Ah, Youtube to the rescue!

I had to refresh my memory on how to adapt a different gauge to a pattern, but after a little math, I was ready to start.

If you are still reading and interested in how I calculated this, I’ve drawn a little chart.

What you do after you figure out your conversion factor, is multiply the stitch count in the pattern by your conversion factor.

So, let’s say the pattern asks you to cast on 30 stitches. You then multiply that number by your conversion factor. Mine is 1.166. (30 X 1.166=34.98). This is the adjusted number of stitches to cast on. You can round up to 35 or down to 34.

Since the pattern is asking to cast on an even number of stitches, which is essential, you should use 34 or 36 stitches. I would probably use 34 in this case.

Then, you would do the same with the rows. Since the conversion factor for rows is close to 1 in this case, I’m not going to make any adjustments, but I might need to when I get to the decreases.

Note: Don’t forget, you may also need to study the pattern a bit more carefully since you may need to take into consideration edge stitches or the number of stitches needed for cables or other designs in your chosen pattern. You may need multiples of 2 or 6 or something else to complete a pattern repeat. But let’s keep this simple for now.

You can try this method whenever you want to use a different yarn with a pattern you like, especially if it’s something simple like a scarf. Of course, you’d always start with something similar if you want your finished item to look like the pattern you are using as your guide. Here where I live, the people at the yarn shops are very knowledgeable and helpful in showing you yarns that may work.

KEEP IN MIND that substituting yarn is almost an art form. Even when yarns may look almost identical, you need to make sure you consider a few other things. And sometimes, it can be nearly impossible to make things work.

Here’s a great video by “Knitting the Stash” on Youtube that explains this. In summary, what you should look for if you want a close match:

Keys to Yarn Substitution

Composition: What kind of fiber makes up the yarn you are trying to substitute, and what are the percentages of each (alpaca, silk, merino wool, etc.)? You want to look for something very similar to get similar results.

Construction: Single-ply, multi-strand, chain, bouclé. This is important because it will change the way your fabric looks, feels, and how much it drapes.

Grist: This is the density of the yarn you’ll use. What is the weight of the yarn? Is it fingering, DK, Aran, or chunky? How many grams and yardage are there per skein in the yarn you want to use compared to what the pattern calls for? You may need more or fewer skeins to get the same yardage, so it’s always good to check.

Color: This is a very personal choice, but good to check if there will be enough in your chosen color. Remember to check the dye lot and get a bit more in case you run out.

Availability: This one is obvious.

For this project, I know the composition is very different, 100% wool instead of 50% cotton-50% acrylic. Thus, I’m not expecting to get the same drape as I would if I were using the cotton blend specified in the pattern. My stitches will not be as defined as if I were using cotton, but I’m willing to try this out.

Anyway, what seemed like a quick project is probably going to take longer than I hoped. But, look at all that I have learned!

And here’s a look at my project so far, the left front is ready and looking good.


April Blouse Update

My April blouse is slowly growing! I’m almost done with the third ball of yarn. I have eight balls. But I don’t want to rush. My goal right now is to finish by September, before it gets cold again.

The lifelines I started using after I made a mistake I couldn’t fix and had to start over are helping a lot. Knowing I won’t need to start over makes me very happy.

Something I learned is that the material and weight of the yarn you choose for your lifelines matters! This is because the first row you knit with the lifeline can be a bit difficult to knit because of the added thread.

I tried cotton in a similar weight as the yarn I’m working with first, but it was too thick and the stitches were getting stuck.

Then, I tried some fishing line I borrowed from Patrick. The fishing line worked great because it’s just as smooth as my circular needle cable, so the stitches could slide off the needles smoothly, making it super easy to knit that first row. The only problem with this material is that you need to know how to make a very good knot or else you’ll be nervous about it coming undone the whole time! My knot was pretty strong, but I decided to try something else.

I opted for a thinner, fingering-weight thread. This made it a lot easier to knit the first row, although knowing it can break easily, makes me a bit nervous. So, I might go back to the fishing line. For peace of mind, I’m just adding lines every eight or 16 rows –– just in case. Anything is better than starting over!


In other news, I’ve been out hiking this weekend. We are having a four-day weekend because of the Fourth of July holiday and the pool is closed for a few days. It’s beautiful outside and I love that my running shoes are starting to look like real hiker’s shoes.

I just need to remember to bring my water bottle when I go on hikes. I had a bit too much sun on Saturday, but I’m feeling better.

These are some photos from my Saturday walk, which you may have already seen if you follow me on Instagram.

This is one of my favorite hikes. It’s about three miles. What I love about this hike is that you are on a path all the way surrounded by nature and pretty views like Mt. Tamalpais in the distance and Corte Madera Creek. I always see some ducks, and sometimes geese.

This time, there were lots of kids riding their e-bikes. Thankfully I heard them just in time to get out of their way. For some reason, they remind me of the Harley Davidson crews that used to ride through Stinson Beach on the weekends. Watch out!

week 23 recap: my rosaline skirt, mark bittman’s rhubarb crisp, and the movie I want to see

I made a skirt!

If you follow my Instagram, you may know that I started a new project a few weekends ago – I decided to make the Rosaline skirt, which is a free pattern from Peppermint Magazine.

THIS PHOTO: PEPPERMINT MAGAZINE, ROSALINE SKIRT PATTERN

I love that you can download and print digital patterns at home by just clicking a few buttons, and start sewing (almost) right away. 

If you download and print the PDF pattern as I did, make sure you have enough ink in your printer and paper in the house. You should also have some glue. I used one of the many glue sticks I still have at home from when the kids were little. (I’m amazed they haven’t all dried out by now!). You’ll also need enough room to lay all the sheets of paper down after they’re glued, before you can start cutting the actual pattern pieces. (I opted for the floor.)

It took me about one and a half hours to print, cut, and glue all the sheets, and then cut out each piece of the pattern. After that, I called it a day.

The next afternoon I was ready to cut the fabric. I had the exact amount needed to make the skirt — it was all that was left of the bolt at the store, so I got a great discount. This also meant there was no room for mistakes, so I took my time with this step.

sewing the skirt

The pattern instructions were fairly easy to follow. I had to read over some parts more than once, mainly because some techniques were new to me. The stitch-in-the-ditch technique, for example (a cool way to conceal your stitches), and learning to add pockets.

I watched a video that my Costa Rican friend recommended (thanks, Deborah!). This was a great reference for understanding how to attach the flounce. 

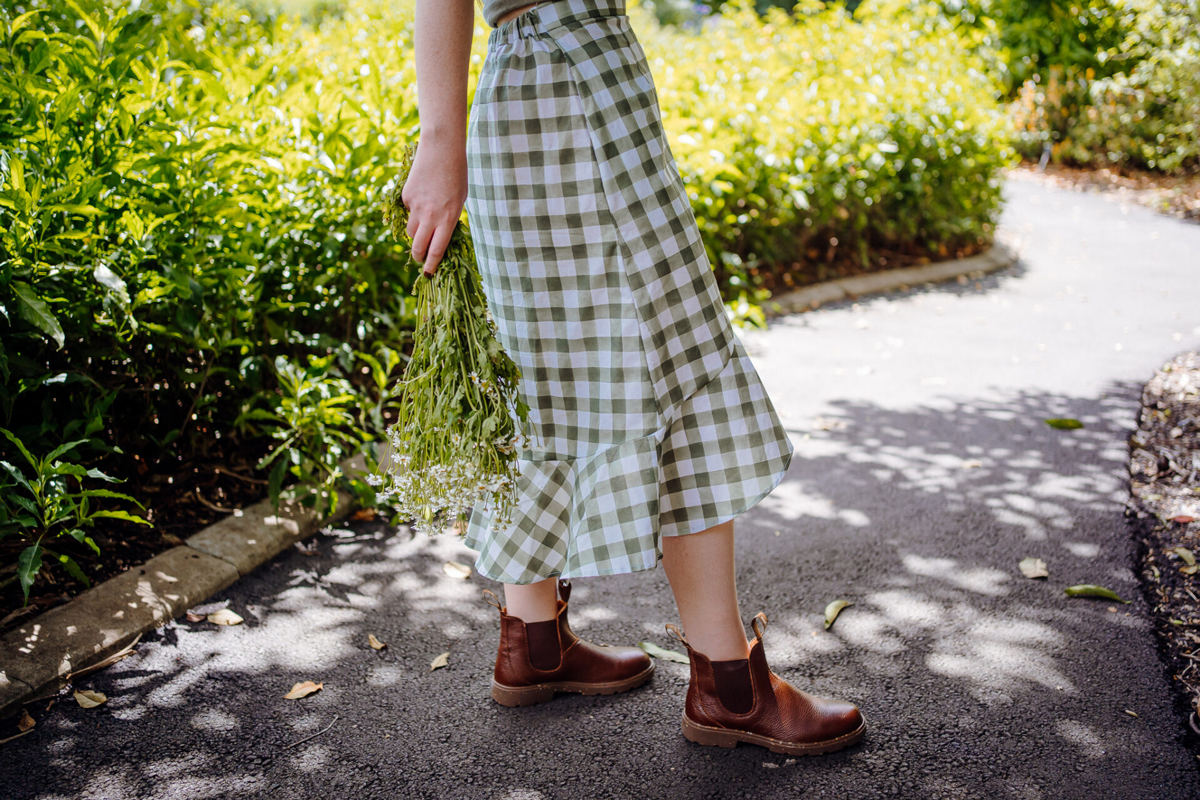
I really like the overall design and length of this skirt, but I think a lighter fabric could be a good idea; I used cotton for mine.

I made this!

modifications to consider

The designer of this pattern (Johanna from Forget-me-knot Patterns) made some modifications to her Rosaline skirt that I think turned out great.

She eliminated all the extra fabric on the back and added darts and a zipper. If you are interested, you can read more about her process and find more of her patterns here

decisions to make…

After finishing the skirt and trying it on yesterday, I think I must have chosen the wrong size. I feel like there’s a lot of fabric around my hips, which is making me feel like I’m swimming in the skirt.

So, I’m debating whether to fix it or not. I think I could remove the waistband and rip the edge seams (saving the pockets), trim 1-2 inches from each side, and sew it back together. I might even get away with not having to redo the flounce, but it’s a bit much to think about right now. On the positive side, it’s all a learning experience, and the fabric was not expensive at all.


Sunday night: rhubarb crisp

In other news, I finally tried Mark Bittman’s rhubarb crisp recipe last night.

rhubarb mixed with sugar and orange zest

The recipe is ridiculously easy to make and also very good! I loved the topping so much, I think I want to make it again with some apples we have in the fridge. Mmm!

Just add vanilla ice cream.

Mark Bittman’s Rhubarb Crisp

Ingredients

3-6 stalks of rhubarb, not too thick, trimmed and cut into 1 1/2-inch pieces.
note: the recipe calls for 5-6 cups of fruit, but I only had 3 big stalks and we liked the result.
1/4 cup white sugar

1 teaspoon orange juice

1 teaspoon orange zest

Note to self: Memorize this crisp topping! (and add a little orange zest)

6 tablespoons cold butter, cut into small pieces, plus more for greasing the pan
note: after cutting the butter into small dice, I let it sit on the counter so it would be easy to mix together with the other ingredients without needing to pull out the food processor. Fewer dishes to wash.

3/4 cup brown sugar 
1/2 cup all-purpose flour 
½+ teaspoon cinnamon 
pinch of salt 
1/2 cup rolled oats 
1/2 cup pecans
note: I didn’t have any pecans in the house. I read later some people doubled the rolled oats amount to replace the nuts. I might do that next time, but I think you could also use almonds.

Method

Heat oven to 375 degrees. Grease a baking or gratin dish with a little butter. Toss rhubarb with white sugar, orange juice, and zest, and spread in a baking dish. 

Put the butter in a bowl along with the brown sugar, flour, cinnamon, and salt, and mix using your fingers, until it looks like small peas and just begins to clump together. Add oats (and pecans, if using) and mix to combine. 

Crumble the topping over the rhubarb and bake until golden and beginning to brown, 45 minutes. 

Serve with vanilla ice cream. Makes 6 to 8 servings.


on my mind: Wes Anderson films

Are you a Wes Anderson fan? I watched The Grand Budapest Hotel last Friday, which is one of his films. Even though we’ve owned the DVD of this movie for many years, I had never watched the entire film.

Years ago, my sister recommended this movie to us, and for some reason, after talking to her about it over the phone, I assumed that the film was family-friendly or at least friendlyish. Her son was the same age as our daughter, and I was under the impression that they had all watched it together. (Never mind that it clearly says the movie is rated R on the DVD sleeve!).

So, when one day Patrick arrived home with the DVD in hand, we decided to have a movie-watching afternoon with the kids. Then, all I remember is that shortly after we turned on the movie (this happened about ten years ago, when our kids were quite young), we both looked at each other with an “oops!” look on our face, and swiftly turned the TV off.

And that was it! We never finished watching the movie. 

Last week, I found the DVD in the TV room while I was organizing some books and decided to watch it “again.”

I didn’t remember a thing about the movie, so it felt brand-new to me. What was funny was I couldn’t figure out what scene could have made us decide to turn off the TV so quickly all those years ago.

Oh, and I loved it so much! I cannot believe it took me this long.

Asteroid City

So… on my list this month is to make sure I go see Asteroid City, which is the latest Wes Anderson film. It premiers in some theaters this weekend.

Are you excited to see it?


before I go… cauliflower shawarma

This cauliflower shawarma recipe from Milk Street looks pretty easy and perfect for a quick lunch. Both Sarah and I love roasted cauliflower and I already have cauliflower in the fridge. I think I can get Nick to try it. I’ll let you know if we make it!

Let me know what you’re up to.
Enjoy your weeks!