Latest Posts

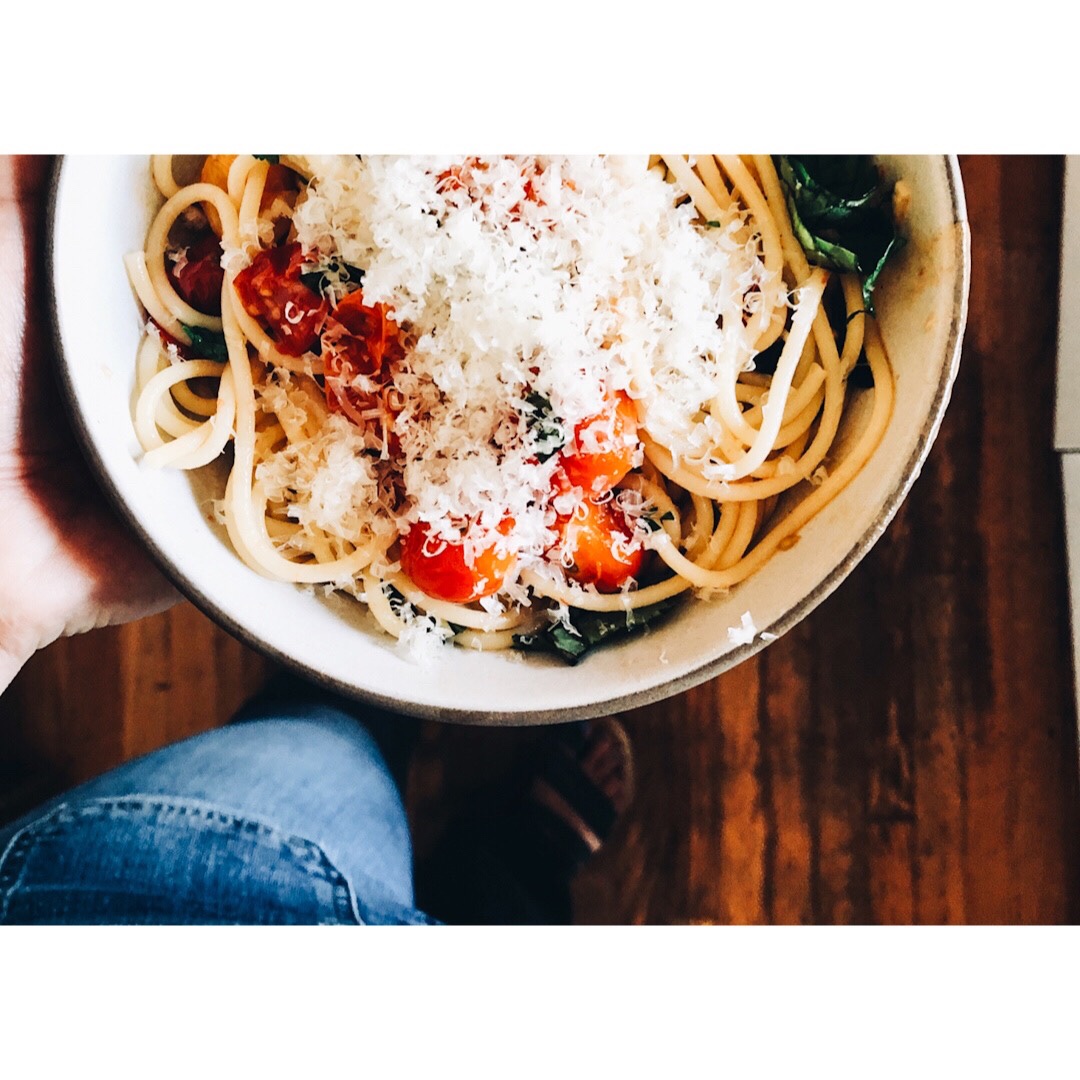
quick pasta with fresh tomato sauce

Hello there! Ina Garten’s recipe for Summer Garden Pasta was trending on my feed for several days and I wanted to try it, but after reading you had to let the tomatoes rest for four hours, I knew it wasn’t going to happen.

If you know me, you know that my favorite recipes are quick and easy to prepare. Waiting four hours? Not for me! But later I found a similar recipe – also by Ina – that could be prepared in just a few minutes. Much better!

I’ve made this two times already in the past two weeks, and can see this joining our weekly staples, like Mustard Seed Chicken, Chicken Souvlaki with Tzatziki, and other favorites.


Ultra sweet, summer tomatoes, the kind you can only find at the market during this time of the year, are the best for this recipe. And don’t skimp on the Parmesan cheese, or my own little secret that I learned from my grandmother: adding one (or two) pats of salted butter right before serving! It makes a huge difference. Go on, try it! 😉

love putting dinner on the table in under 20 minutes

If you find yourself out of basil or red pepper flakes, don’t despair. The second time I made this dish I realized I didn’t have either. So, I substituted ½ teaspoon of Herbs de Provence spice mix for the herbs, and a little cayenne for some heat.

My eye doctor has told me I need to eat more dark leafy greens to keep my eyes healthy. So, I mixed in some arugula right before serving the pasta. I got my vitamins and that wonderful green contrast, similar to basil.

Quick Pasta With Fresh Tomato Sauce
(adapted from Ina Garten)

1 box of spaghetti or linguine (I used Barilla)
2 Tbsp. Kosher salt (to salt the water for cooking the pasta)
6 cloves of garlic, finely sliced (at least 2 Tbsp.!)
¼ cup of olive oil
½ tsp. red pepper flakes
2 pints of grape or cherry tomatoes, sliced in half
Basil, about 10 leaves sliced thinly
Salt and pepper to taste
½ cup Parmesan cheese (grated; more for serving)
2 tablespoons butter (preferably salted)

**In a pinch (if you are out of fresh basil and/or red pepper flakes):
substitute with 1 tsp. Herbs de Provence spice mix, ¼ tsp. cayenne pepper, and handful of arugula for each plate.

Steps:

  • Bring a large pot of water to a boil and cook the pasta following the instructions on the box. (I used Barilla and like to add salt to the water. I find that 2 Tbsp. is a good amount.)
  • Finely slice the garlic and prepare the tomatoes by cutting them in half.
  • In a large saute pan, heat the oil, add garlic and red pepper flakes (herbs de Provence and cayenne, if using**), salt and pepper to taste.
  • Add the tomatoes and let them cook in the flavored oil for about 10 minutes.
  • When the pasta is al dente, remove the noodles from the pot, add them to the pan with the tomato mixture.
  • Add ¼ cup Parmesan cheese, butter, and fresh basil/arugula.
  • Toss well and serve with some extra Parmesan cheese, to taste.

Note: This dish is great hot or cold, so you can save any leftovers in the fridge and make it a quick lunch the next day. Perfect for school or work lunches.

Enjoy!


💛 Gabi

have you heard? westknits’ mystery knit-along launched today

Not too long ago I mentioned how much I love Stephen West’s colorful shawls, and this year I have decided I absolutely need one in my closet.

So, this morning, just a little after 7 a.m. San Francisco time, I joined the 2022 MKAL and selected my yarn. Now I’ll sit here patiently and wait until my kit crosses the Atlantic and reaches my mailbox all the way from beautiful Amsterdam. 

Last year, the MKAL (short for mystery knit along) was a pattern called Shawlography, which might be my favorite @westknits design – so far! I love all the different textures and colors. I have been dreaming of making one exactly like the one Stephen West is holding in this photo, but this morning I ran into this one by Domic, and well, I might need both!


photo credit: @westknits

It makes me wonder what this year’s pattern will look like. It’s called the twists & turns shawl and there is a cable needle included in the kit, so I guess there will be some cabling? I cannot wait until October 6 when we get our first clue to get started.

With so many yarns and colors available in the world, choosing materials for a project like this one can be a bit intimidating. Thankfully, Stephen gives a lot of information and guidance for choosing the best colors for the shawl, or you can do what I did and buy the full kit with color combinations handpicked by Stephen himself.

Perhaps because it’s still summer and super warm where I live, I’ve been drawn to pinks and peachy colors all season long. So, when I saw the Holst Pink combo, I immediately knew it was the one for my future shawl.

This will be my first ever Stephen West knit-along, and so far I’ve been quite impressed by how well organized it is. From videos explaining how the KAL works, to information about the yarns you can use and color selection, and even a must-watch video by Stephen West covering FAQs that had me laughing out loud, especially the part about having to buy more needles because all the other ones were holding other WIPs. (So many of us can surely relate!) 

I must admit, I am a tiny bit nervous about the KAL. The shawl is knitted in sock weight yarn and I am a pretty slow knitter. So I hope it’s not too difficult, and that I can keep up with everyone else. Have you seen his other shawls? Not exactly easy-looking.

I couldn’t believe the kit I chose this morning was already sold out when I checked the site again later today. Lots of people all over the world will be knitting this shawl. So, if you are interested in joining the KAL and buying one of the ready kits, you should do it soon!

Of course, you can always create your own bundle from yarns you have in your stash, or find them at your local yarn store. Luckily many stores around the world have already prepared for this KAL. 

I promise to post updates of my progress. Maybe you’ll join me?

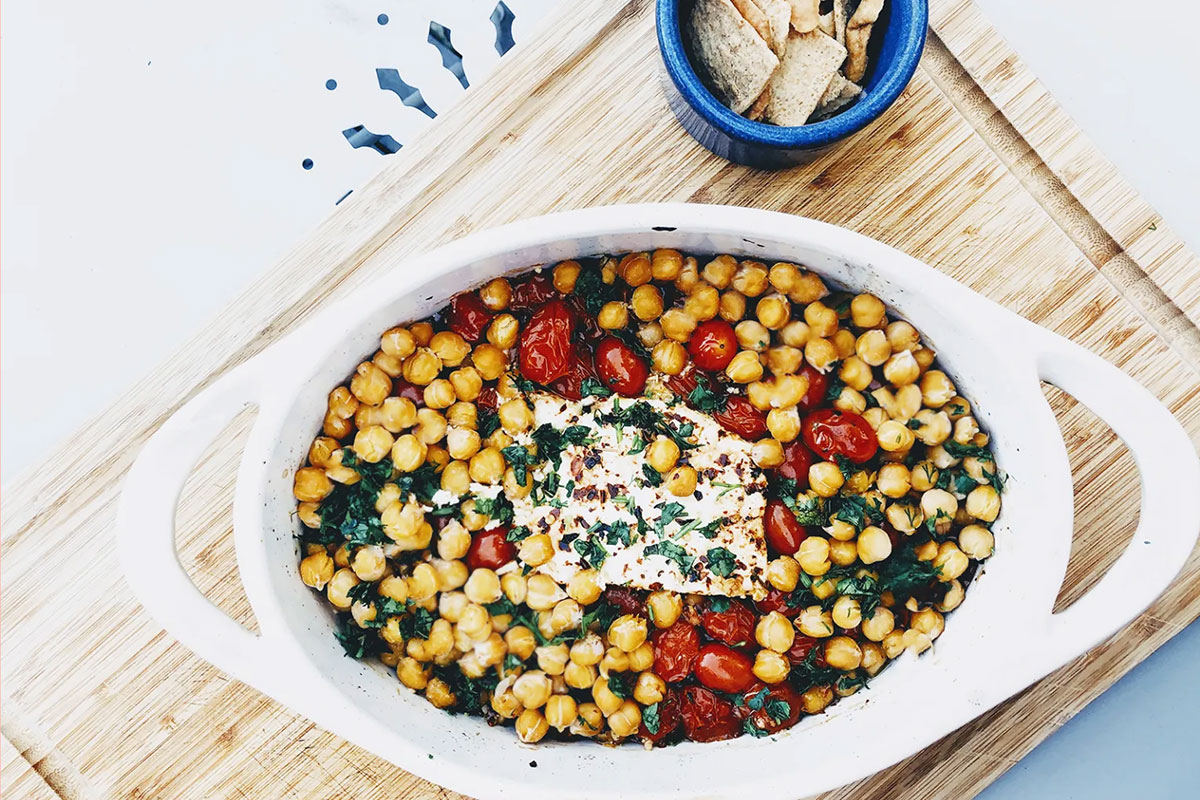
an easy feta, tomato and chickpea appetizer (or lunch!)

Hello! I know it’s been a while since I’ve been here, but I’ve been super busy with visits, trips, birthdays, work, and what seems like all the medical checkups and appointments we didn’t have in two years all squeezed into the last month!

My sister came to visit and that is always a treat. We explored a few places in Marin and San Francisco. We went to a trade show and caught up on our lives. It was fun! Then, we celebrated Sarah’s birthday. She turned 18 this year, which is hard to believe. We went down to San Diego to look at the school she might be going to. It was hectic but good. I am in denial of all that’s coming our way when she actually moves away for college. (Deep breaths!)

As I said, all the activities this month haven’t left much time for cooking or knitting anything new — but last week, when I saw this recipe on Instagram, I really wanted to try it.

The recipe is by @smittenkitchen. Apparently, “the original” recipe by a Finnish blogger went viral on TikTok some time ago. I don’t think there is any way you can go wrong with these ingredients. If you don’t have chickpeas, white beans seem like a good alternative. If you don’t have fresh tomatoes, I bet canned will do just fine! This recipe is the type that allows you to experiment a little. I also recently saw something similar with feta, white beans, and eggs, which I’m dying to try. Yum!

I followed Smitten Kitchen’s recipe pretty much as it was written, except that I cut it in half because only Patrick and I like feta cheese. This turned into a quick appetizer before dinner and my lunch the next day. The changes I made were minor, like using chili flakes instead of fresh chilies and choosing lots of parsley and a little mint for the final garnish. And since we were making burgers for dinner, I also added some of the caramelized onions Patrick makes for our burgers right before digging in.

Notes: This amount was perfect for the two of us and would be plenty for a small group of people as an appetizer.

Go on, give it a try! I think you’ll like it.

Ingredients

  • 1 (4 oz.) block of feta cheese
  • 1/2 cup of extra virgin olive oil
  • 2-3 cups of grape/cherry tomatoes
  • 2 cloves minced garlic
  • 1 tablespoon chili flakes
  • 1 (15 oz.) can chickpeas
  • 1/4 cup chopped parsley
  • 1 Tablespoon chopped mint
  • Salt and caramelized onions (optional, to taste)
  • Plain pita bread, each circle sliced into 4 equal pieces

Method

Preheat your oven to 400ºF. Place the feta in an oven-safe dish and add the tomatoes around it. Add the olive oil and sprinkle chili flakes on top. Bake for 15 minutes. In the meantime, drain and rinse the chickpeas and prep the pita bread. When 15 minutes have passed, open the oven and add the chickpeas, change the oven setting to broil, and place the dish in the top rack of the oven so the feta and the tomatoes get a little more color (about 10 minutes). At the same time, place the cut pita triangles on another baking sheet on the lowest part of the oven. Serve right away.

spring in the air, bubble waffles + my new bedford pullover

Spring is in the air, flowers are blooming, and birthday season is just beginning for our family. This week we celebrated Patrick’s birthday. A nice dinner at Marinitas, the local restaurant which we’ve decided sells the best margaritas in town, was the perfect place to celebrate mid-week. The celebrations continue for the other March babies this weekend, which should be fun.

Center Depot in San Anselmo: a nice treat after a morning walk

I’ve been eyeing the Center Depot in San Anselmo for months — I drive past it right when they open after I drop my son off at school in the mornings. It is located about a mile from downtown San Anselmo, and I keep imagining myself stopping by with Patrick or one of my friends after a brisk morning walk on the weekend. (We’d deserve it!) I find the little camper truck super charming. Plus, the fact that it’s located in a less commercial section of town makes it even cuter.

You can get bubble waffles, Italian sodas, a.k.a. “sparklers,” doughnuts, hot cocoa, and espresso drinks out of the little truck. Lucky me, I couldn’t believe the place wasn’t packed with students from the high school, which is just a few blocks away, when I got there. I was able to get a table to enjoy my mid-morning treats.

Have you tried bubble waffles? They are so fun to eat. If you were the kind of kid that loved popping bubble wrap, bubble waffles are for you. Eat them while they’re hot to get the best experience. It was a warm day when I stopped by, so I ordered a “Plain Jane” waffle and a sparkler called the “Maui Sunset,” a refreshing mix of guava and pineapple flavors. You should definitely stop by and try these waffles if you are in Marin!

Oh, and of course, the maker in me couldn’t resist the idea of trying to replicate bubble waffles at home someday. So, I’ve tracked down a bubble waffle recipe and the equipment I’d need if I ever do that. But I think I’m better off sticking to the brisk walks in the morning before indulging in these fine treats!

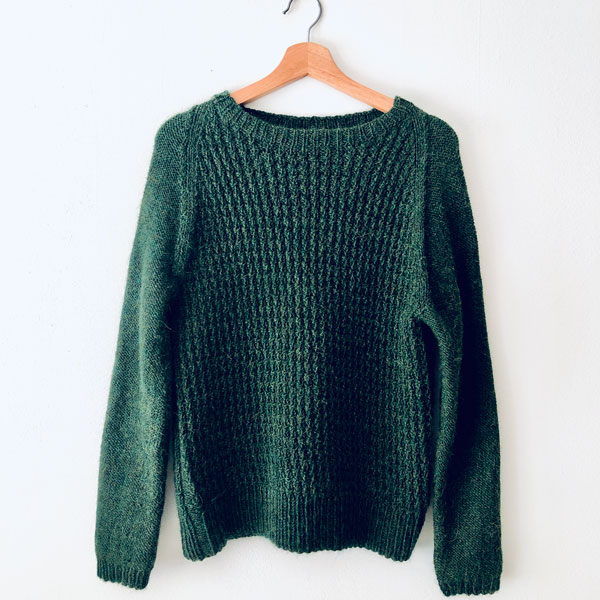
Bedford Pullover – Done!

It’s done! My new Bedford pullover is in my closet (nicely folded, by the way).
Never use a hanger to store your knitwear unless you do it this way, or you’ll end up with stretched-out sweaters!

The sweater was pretty easy to make, but I must admit there were some sections where I wasn’t sure if what I was doing was right.

A few notes on this pattern:

  1. This is considered an “adventurous” beginner pattern, and I agree with the description. It is an easy 4-row repeat, and because there are no increases or decreases in the body, the knitting up to the sleeves is super easy.
  2. If you memorize the 4-row pattern repeat and know how to read your stitches, this will be a breeze. After knitting the sleeves, I realized I had completely forgotten how to tell which row of the pattern I was on, and it took me a whole afternoon and some unraveling to figure it out. Lesson learned? The importance of keeping knitting notes!
  3. Purling is not as fast as knitting when you are an English-style knitter like me. An idea for speeding up the sleeves: knit them on the reverse, so you don’t have to purl?
  4. Knitting the sleeves in the round with double-pointed needles, and even with the magic loop method, left a visible line in the places where I switched from one needle to the next. To avoid this, I learned to constantly shift the place where I started to knit with the next needle, but I could knit the sleeves flat next time and seam them, that might be easier.
  5. The pattern has so many pages it can be a bit overwhelming. Don’t look ahead too much. Just take it one step at a time.
  6. There is a part where you are asked to break the yarn and rejoin it, but they don’t tell you that you need to slip some stitches in order to do that — or I misread the instructions, perhaps? I found it a bit confusing.
  7. Make a note of this: You need stitch markers to make this sweater, and I recommend the locking type. I started the sleeves using my favorite Coco Knits markers, but because they don’t lock, one fell off and I lost my spot while working on the decreases and it was difficult to find my way back to the right spot.
  8. The pattern asks you to cast off using Elizabeth Zimmerman’s bind off technique, which is helpful for other projects since it’s meant to match a long tail cast on. For a tutorial on how to do this cast-off, I recommend watching the Brooklyn Tweed video. It’s super straightforward. The only tricky part about this bind off is that it’s sewn and you need to estimate the length of yarn you keep to complete it, which can be nerve wracking. Just do as they say and add a bit extra. That’s what I did.
  9. I knit this sweater using Berroco Ultra Alpaca yarn in the Peat Mix color, and I love the results. It is SUPER soft and has a beautiful drape.
  10. I would definitely make this again using the same yarn.

That’s all for this week. Enjoy the first week of spring!